
You don’t need to be a professional photographer to capture great images of your work. With just a few simple techniques, you can dramatically improve the way your projects look in the photos you take. Good photos help to tell your story as a company, highlight your craftsmanship, and build trust with future clients. This guide will give you simple, practical tips to help you take better photos with the camera you have on hand — even it's just your cellphone.
Get Permission First!

If the subject you’d like to photograph is work done for a client, the first thing you should do before taking any shots is get permission in the form of a signed consent form. Be clear about what you intend to photograph and how the images will be used. Most clients are happy to oblige, but occasionally they may decline. For example, the work may contain sensitive information, may not yet be publicly unveiled, or may be part of a private space. In those cases, you must respect their wishes. After all, no matter how good the photo is, it’s not useful if you don’t have the right to share it.
Using Flash
While flash is sometimes necessary, try to avoid it if possible. Flash can flatten colors, create stark shadows, and produce harsh glare on glossy surfaces. If you have good daylight (especially diffused light from a window), it usually looks better than flash. Sometimes, coming back to take the photo at a different time of day is all it takes to make flash unnecessary. That said, if you’re in a pinch and it’s either flash or nothing, there are some things you can do to minimize undesirable effects.
Diffuse the flash: A direct flash is harsh, but you can soften it by placing a thin tissue or piece of paper over the flash. This spreads the light more evenly, reducing hot spots and giving the print a more natural look.
Mind the distance: If you’re too close, the flash will blow out details. Too far, and the flash will have little effect. The sweet spot is somewhere in between. Take several shots from varying distances to see what looks best.
Watch for shadows: Flash can create dark, hard-edged shadows behind dimensional objects like mounted boards or framed prints. If possible, position the piece away from the wall, or use another light source to balance things out.
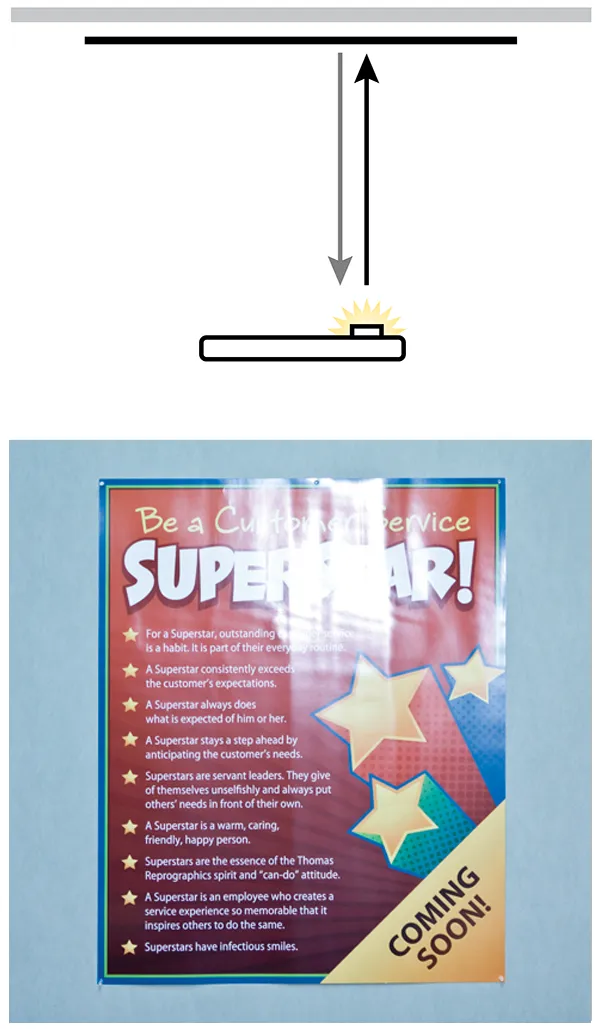
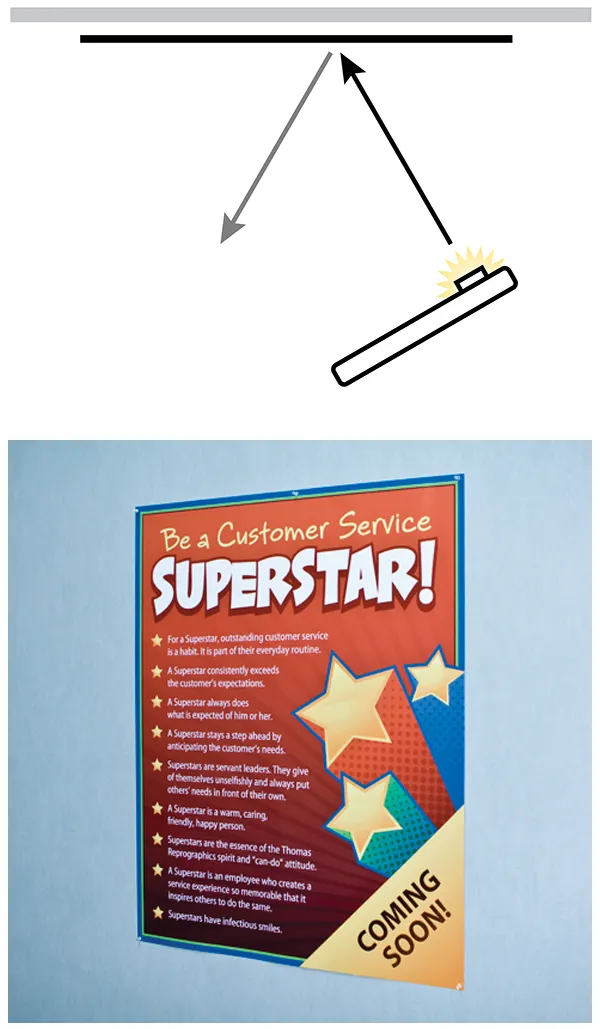
Adjust the angle: If the flash is causing glare on the surface of your subject, It may be necessary to take the photo at a different angle so the light from the flash does not reflect right back into the camera lens.
Use bounce flash: If you happen to be using a dedicated digital camera with an external flash, bouncing the flash off a light colored wall or the ceiling will enable you to take a head-on photo while avoiding glare.


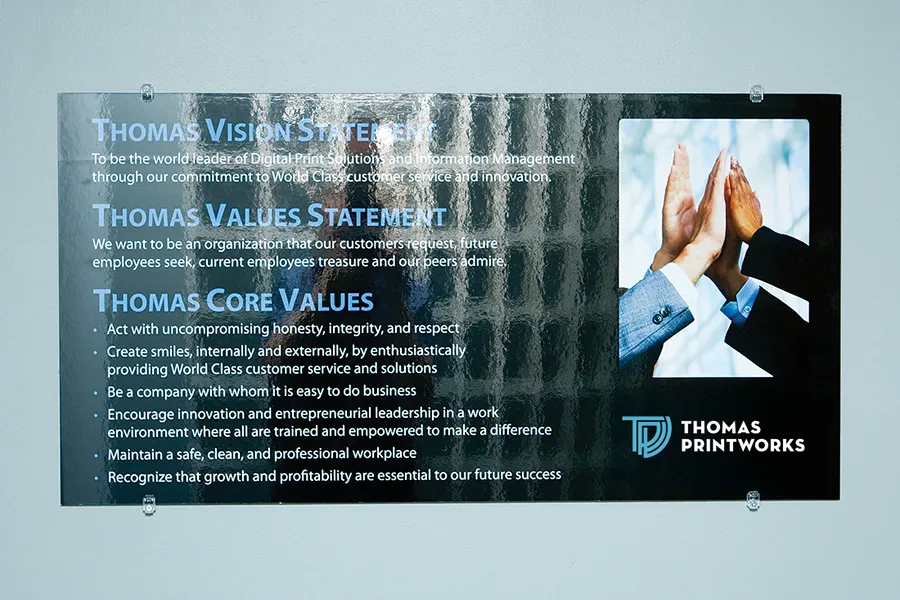
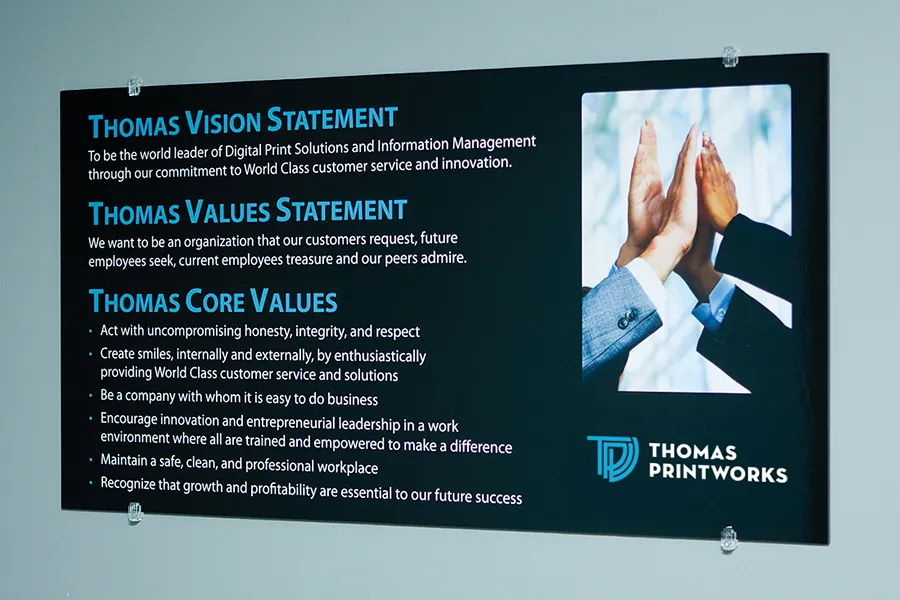
Dealing with Reflections
If the printed piece is glossy, it’s going to reflect light, usually resulting in undesirable reflections of its surroundings in the photo. This is not limited to flash glare alone. While you cannot prevent reflective things from reflecting, you can control what they reflect by adjusting your position. In the example below, the second picture was taken at an angle so the poster reflected the adjacent blank wall rather than the complex background behind the camera.
Pro Tip: A circular polarizing filter attached to your lens will usually solve this problem completely. This isn’t limited to professional cameras, either. Clip on polarizers for your phone are available for around $20.
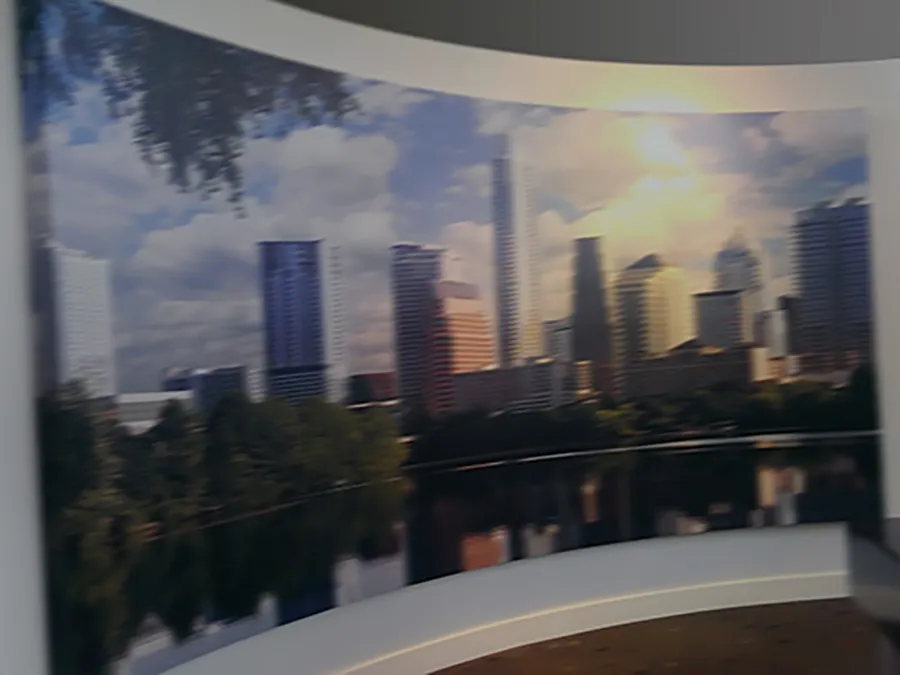
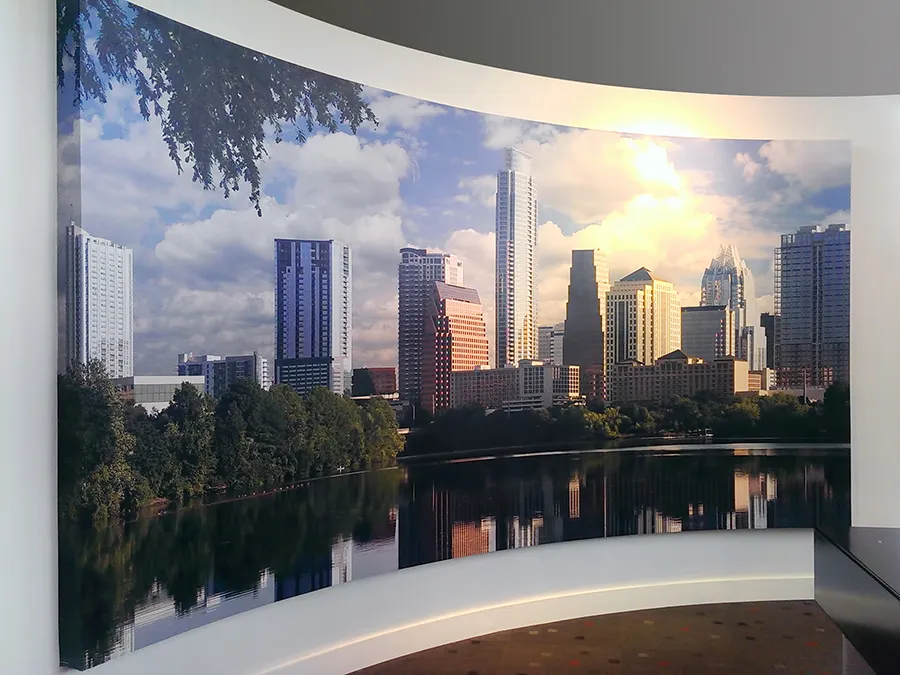
Field of View
Pictures taken up close with a short focal length (i.e., zoomed out) tend to be more distorted than pictures taken from far away with a long focal length (i.e., zoomed in). Whenever possible, and particularly when photographing very large objects, favor the latter method. The photos below show an extreme example of this effect.


Tidy the Scene Before You Shoot
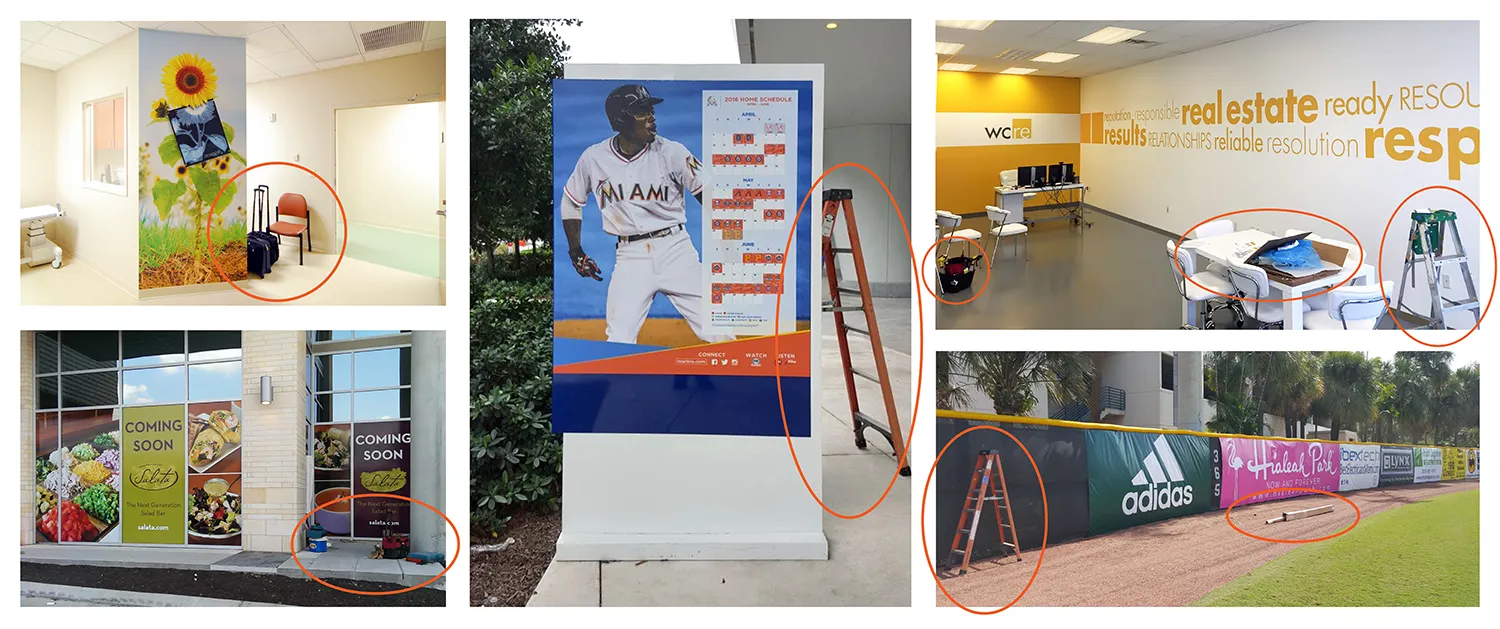
Before snapping any photos, take a moment to clean up the area around your subject. Ladders, toolboxes, packaging, and other job site clutter can make an otherwise great photo look unprofessional—or even unusable for marketing or portfolio purposes. A clean, distraction-free scene puts the focus where it belongs: on the finished work. Think of it like staging a room before a real estate photo. It makes a big difference in how the final result is perceived.
Avoid Awkward Angles
Little is more OCD triggering than something that is almost, but not quite, right. Photos that are taken precisely head-on or clearly at an angle are more visually pleasing than photos that are not quite either one. Unless you have a specific reason for using a slight angle (such as avoiding reflections as previously discussed), a more intentional angle is preferred.
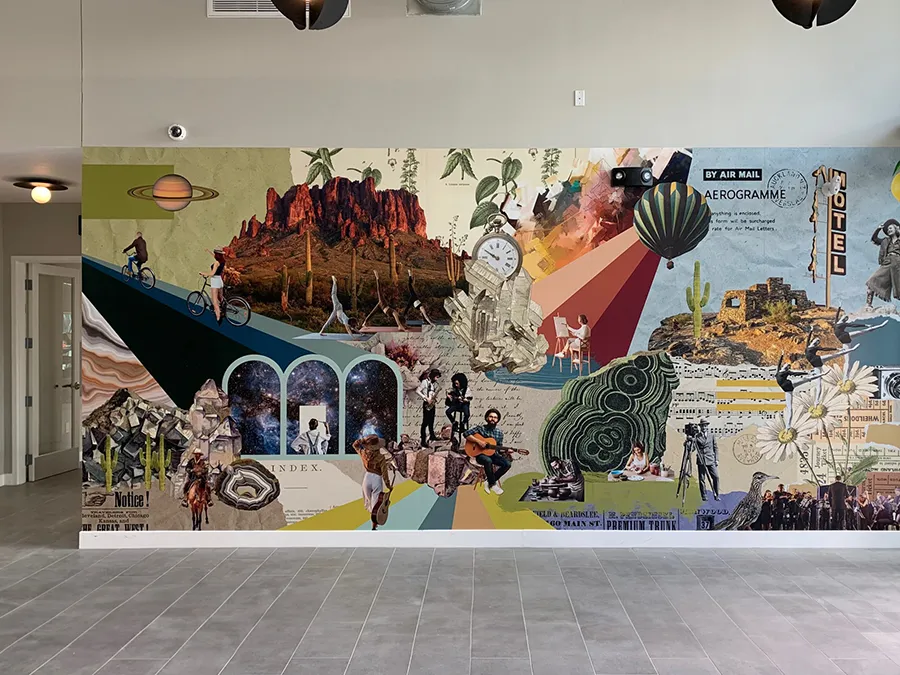

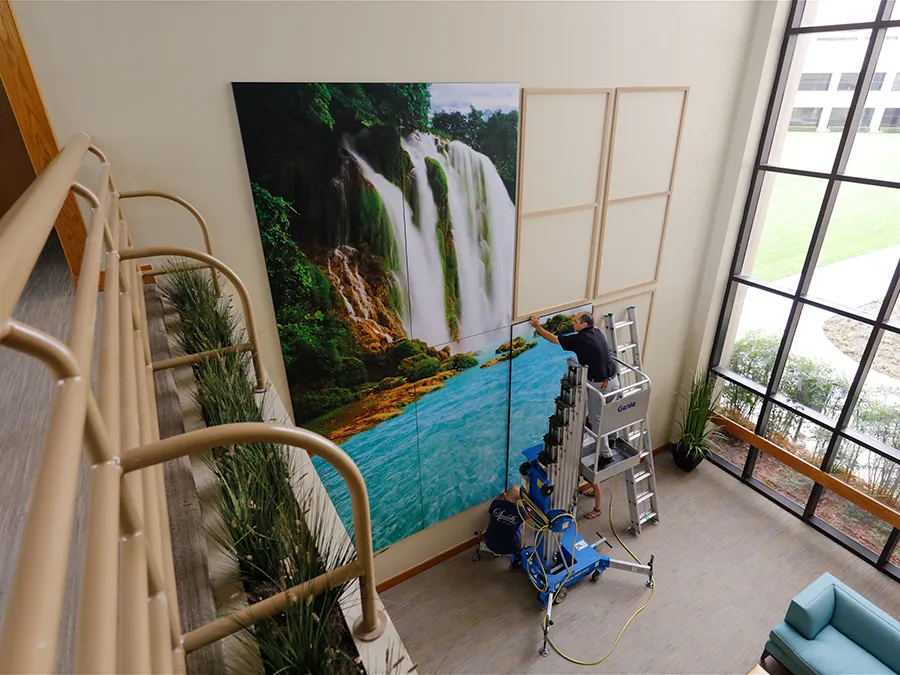
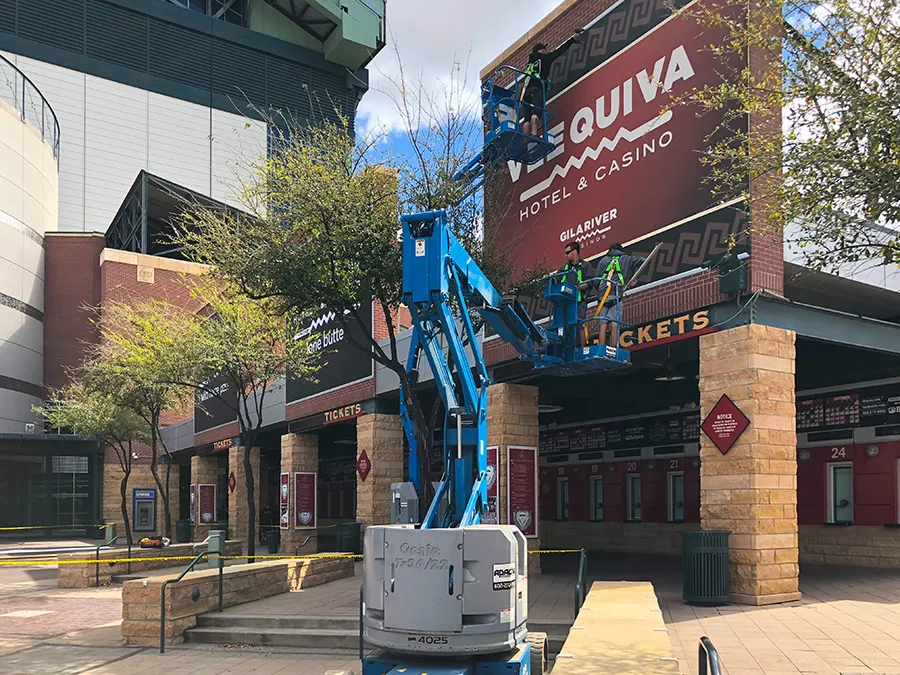
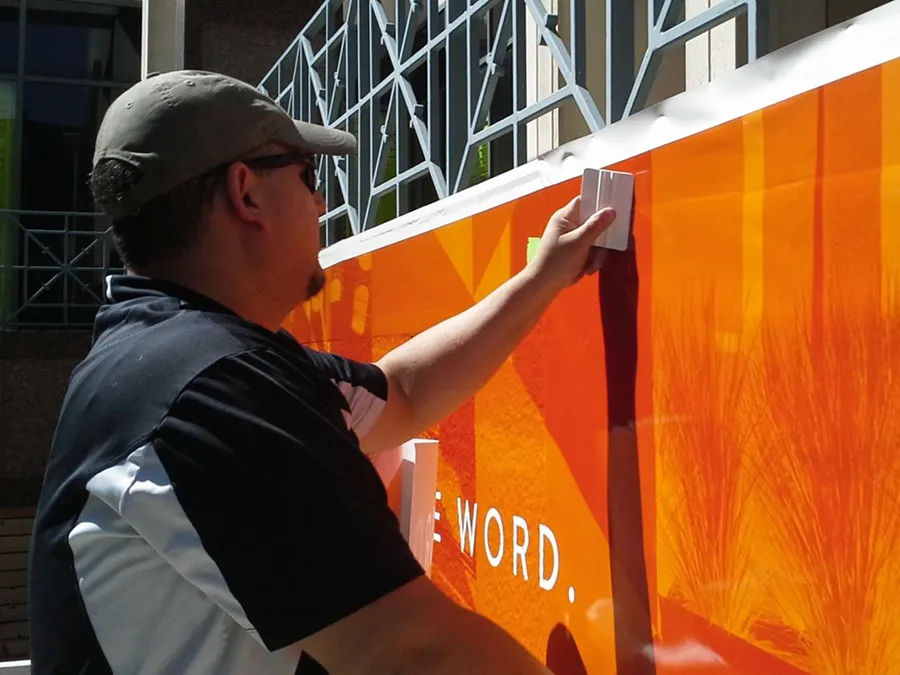
Installation Photos Are Great, Too!
While clean, polished shots of the finished product are the main focus here, in-progress installation photos are also incredibly valuable, especially when they showcase the skill and effort that goes into the work. Candid shots of technicians applying graphics or handling materials can be great for behind-the-scenes content and storytelling. Just make sure the area is relatively tidy and free from excessive clutter. A little realism is fine, but avoid wide shots with scattered tools, trash, or unfinished areas that could distract from the main focus.
Check the Photo
Thanks to the magic of digital photography, multiple shots are just as free as a single shot. If your photo is dark, blurry, grainy, muddy, low resolution, crooked, cropped off, has random objects littering the scene, or is otherwise less than great, try, try again!
Conclusion
Great project photos don’t require expensive equipment; just a little attention to detail and a willingness to try again if the first shot isn’t quite right. By using good lighting, watching your angles, and cleaning up the scene, you’ll create images that impress clients, attract prospects, and shine on social media. The more consistent you are in how you present your work, the stronger your brand becomes, and it all starts with the photos you take.