Do you ever get tired of the same boring canvas wraps or framed pictures? We do! Working in collaboration with one of our favorite artists, Brad McMinn, we set out to create a special piece for the ones who wanted that unique piece of wall art for their office or home.
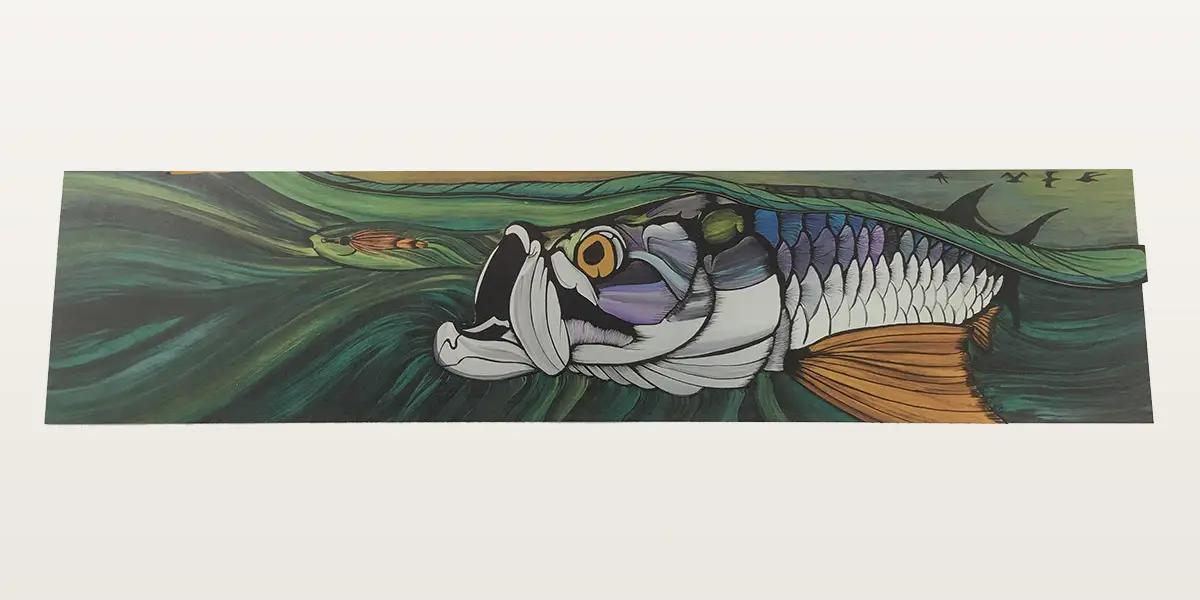
This project started with Brad. He managed the hard part by painting his art directly to wood, which allowed the beautiful natural grain to show through. Using a high-res art scanner to pick up all the texture and detail of the art, the original piece was scanned in at over 600 ppi. This was saved out as a high-res TIFF, which we then turned over to our prepress team.
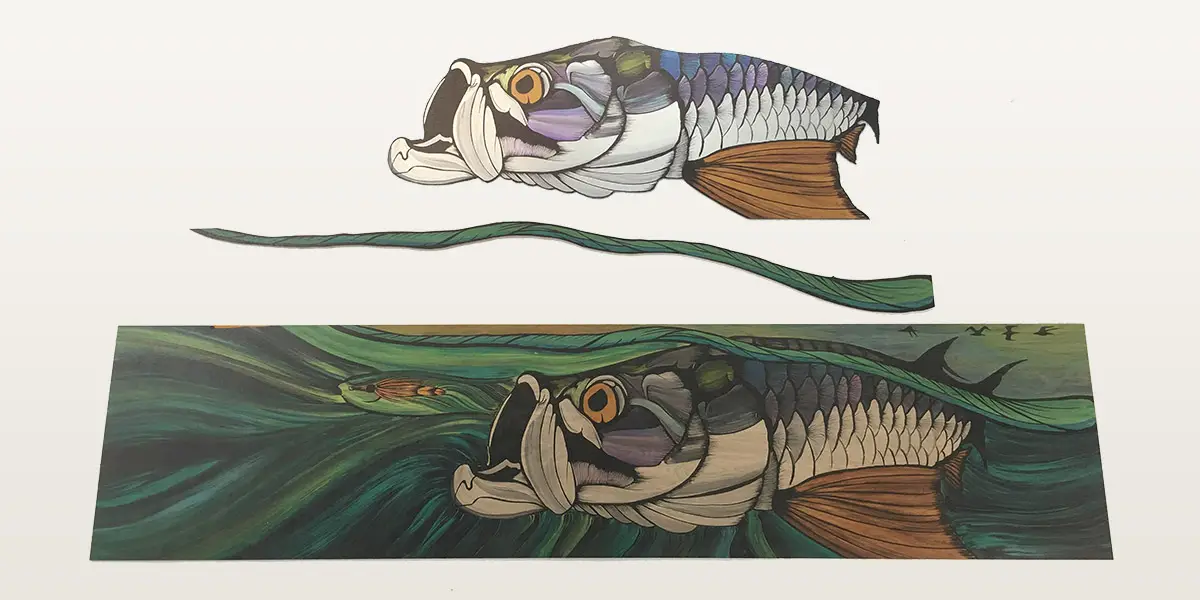
Using Adobe Illustrator, the magic began to happen! This process is very time-consuming and is always underappreciated. The prepress team carefully and accurately traced each item that we intended to use. This created multiple layers and files for us to send to our printing department.
Prepping the substrates was also a very important step. We started by hand-selecting each piece of plywood, checking for texture, grain flow, straightness, and color. These were all very important considerations so we could get the best-looking finished piece and keep from damaging our priceless equipment at the same time. The wood was then brought back to the shop, sanded, cleaned and prepped with anything else needed.
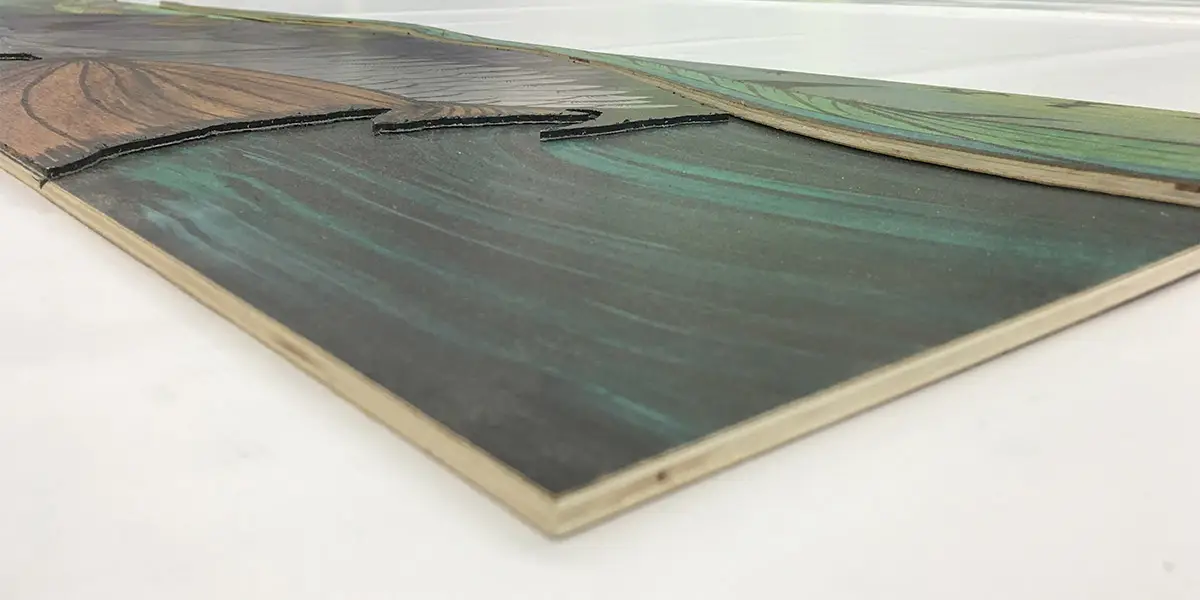
When choosing our brushed metal, there were really no issues, as it comes to us with a protective release liner and is rarely ever damaged. We then chose the thickness of the 3D effect we were going with. We mounted this specific project to 1/4” black PVC to give it some subtle depth. Once all the pieces had been mounted to their specific depths and prepped accordingly, we moved on to the printing phase of the project.
Now that all the prep was done, we then laid the plywood or metals directly on our Océ flatbed, with the grain of the substrates flowing in the previously chosen direction to suit the art. The print mode was run on a slow, high quality mode to ensure it looked great. All of the pieces were run with their individual specifications need. Some even required multiple ink passes to give a raised texture feel. When all the pieces had been printed, we moved on to routing and finishing.
When we got to the router, each item was cut using its designated cut files. The edges were sanded and finished as needed. This was a slow and important part of this project because if anything went wrong it was back to square one!
Once all of the pieces had been routed, sanded, and cleaned of all dirt and dust, they moved into our finishing zone. This was the final step that made everything worth it!
This particular piece required two layers and three depths. We laid the printed plywood flat on the table to prepare for mounting each individual piece and framing with textured cedar. This process was made much easier by the work that our prepress team did earlier in the project. The art went together like a jigsaw puzzle.
Once everything was double-checked for quality and placement, we moved into our cedar frames. We do our framing in 45-degree cuts and squared off cuts, depending on the order preference. We also do an option with 45-degree corner braces for more depth and support.
The last step was adding hanging hardware to the back. We placed an appropriate sized Z bar system on the back due to the size and weight of the art.
Once the hanging system was in place, the piece was finished. The result is a very unique and beautiful piece of wall art that will be admired by all!
Contact us today to learn how we can help you with a project such as this!